www.flickr.com

Friday, September 26, 2008

Good to go...

I found my iLife 08, it was right were I left it. Actually it was with the supplemental install dicks. Remember those two grey disks labeled Disk 1 and Disk 2, well that’s where it was. It was confusing at first because when you install and run Disk 1 it shows you Mac OSX Tiger. Tiger is the old OS, which is why I was confused. You have to run Disk 1 first then Disk 2. Disk 2 is where the iLife 08 lives.

As of 10:00 PM Wednesday night, I completed the install of the last program MAC: Microsoft Office 2004. All I have left is to pick and choose some files to migrate back and some plug-ins for web based programs.

I am really glad I did this clean install and erase. When I purchased his MacBook Pro last year in Dec. I thought it was cool and easy to migrate all my user information that was on Magellan’s MacBook to my new computer. What I didn’t know, was this would migrate everything. Programs, plug-ins, files, folders, music, and anything else I didn’t want.

My notebook has a 120 GB HD, when I was done I had 60GB left and the 40GB of photos I have taken since last December took up of the rest of the hard drive. The is why it became very sluggish.

After the clean install of Mac OSX Leopard and only installing the MS Office 2004, Adobe Lightroom, Toast, iLife 08 and one copy of Photoshop, I still have a ton of room. According to the internal HD info I have used 20.3 GB that leaves almost 97 Gig of free clean space. My computer runs faster and the fan doesn’t run as often.

Time Machine works great on my 1 Terabyte external HD. Once Time Machine is set up, I plug the HD in either with the USB or Firewire connection and Time Machine does the rest for me. It backs up my system every hour.

When you initially set up Time Machine it will take longer then usual to back-up your system. However, every time after that It only backs-up the changed data. All other data is left the same unless it had changed.

If you delete something that you didn't mean to, all you have to do is go back in time on Time Machine and tell it to load from that point. Wow, what a relief that will be, when I delete an entire photo album that I don't have a copy of. I have done that!

My only issue that remains is trying to hook up the 1 TB hard drive up to the Airport Extreme to back up wireless. I can see the drive and download/upload to it, but the Time Machine program will not work through the Airport Express.

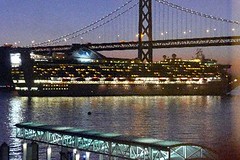
Moving City


Moving City, originally uploaded by Kirk Howard.

I am work watching the Market come completely unraveled. I looked out the window and noticed a huge wall lights steaming past my window. I grabbed my camera and snapped this shot.

It’s not the best picture, but at least it shows you what I was looking at.

Now back to the blood letting of Washington Mutual… Yikes!

Wednesday, September 24, 2008

Half-on, Half-off... My install is Half done.

Start - 4:00 PM September 23, 2008
Finish – To Be Determined

After spending a few hours backing-up and doing an “install and Erase”, will say “it was a success we have ignition.

As I left my house this morning at 4:30AM the 1 terabyte external HD was still going through its MAC OS Extended Journaled rewrite. When I checked on the process as I walked out the door, it still had three hours left… Whoa!

My only hiccup has been I cannot find my iLife 08’. I checked the Leopard install, I also checked the separate MAC OS install bundle disks.

Once I get the iLife 08 figured out I will finish the migration and software install.

Update to follow…

Tuesday, September 23, 2008

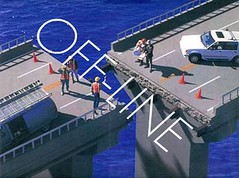
Off-Line


Off-Line tags:, originally uploaded by Kirk Howard.

Today is the day I make the migration to two new storage platforms. Before I make the move, I will be making a clean slate.

1. Back-up existing files and folders (twice)
2. Make new list of necessary software to reinstall
3. Create virtual image of software.
4. Double check system
5. Triple check software and system.
6. Reformat internal HD
7. Reload OS
8. Download critical upgrades
9. Verify OS functionality
10. Make virtual image of HD
11. Initiate Time Machine on New External HD
12. Make additional virtual image.
13. Reload software
14. Migrate file and folders back to internal HD
15. Test system and Bob’s your Uncle.

Goggles… check! Hard Drives… check!, Software… Check! Patience… Double check, CHECK!

Wish me luck I'm going in…